Rising To The Challenge
The tasty tale of sourdough bread
BY Elyse Kiel

Waking up in the morning isn’t easy for everyone. However, a good breakfast can be an excellent motivator.

The process begins by stretching out the soreness of sleep and grabbing the toaster, then reaching toward the top shelf for that delicious homemade bread. Popping it in the toaster for exactly two and a half minutes produces the perfect golden-brown crunch. Add mashed avocado, fried eggs, or a favorite jam to make the meal complete. It’s the perfect breakfast to start the day.
Sourdough bread has strong roots throughout history. It is a multicultural leavened bread that has traveled from its origins in Switzerland in 3700 BC all the way to the 21st century United States, where the raising of dough has become an art form as well as a hobby.
All ancient bread was sourdough and used naturally occurring yeast by combining flour meal and water that was then left to ferment.
In 1500 BC, the Egyptians developed a fermentation process that made the baked dough lighter, softer, and tastier. The slow-rising dough became a staple in diets across the European continent, including ancient Greece and the Roman Empire. These societies enhanced the baking and kneading process. In the 17th century, France developed a complicated, yet highly successful, starter yeast.
In the 19th century, French immigrants traveled to California for the gold rush and brought the recipe with them. The term mother bread started spreading throughout San Francisco once the process was improved by using flour meal and water with fermented bacteria. This made the bread even fluffier and tastier, slowly becoming close to the recipe we know and love today.
The bread-making process traveled to Canada in 1898 with the gold hunters of the Yukon territory. The harsh weather prevented the bread from being baked at regular times, so the miners carried their starter with them in packs. They often slept with the packs nearby to prevent the starter from freezing. This earned the miners the nickname Sourdough, as the sour smell of the bacteria would linger.
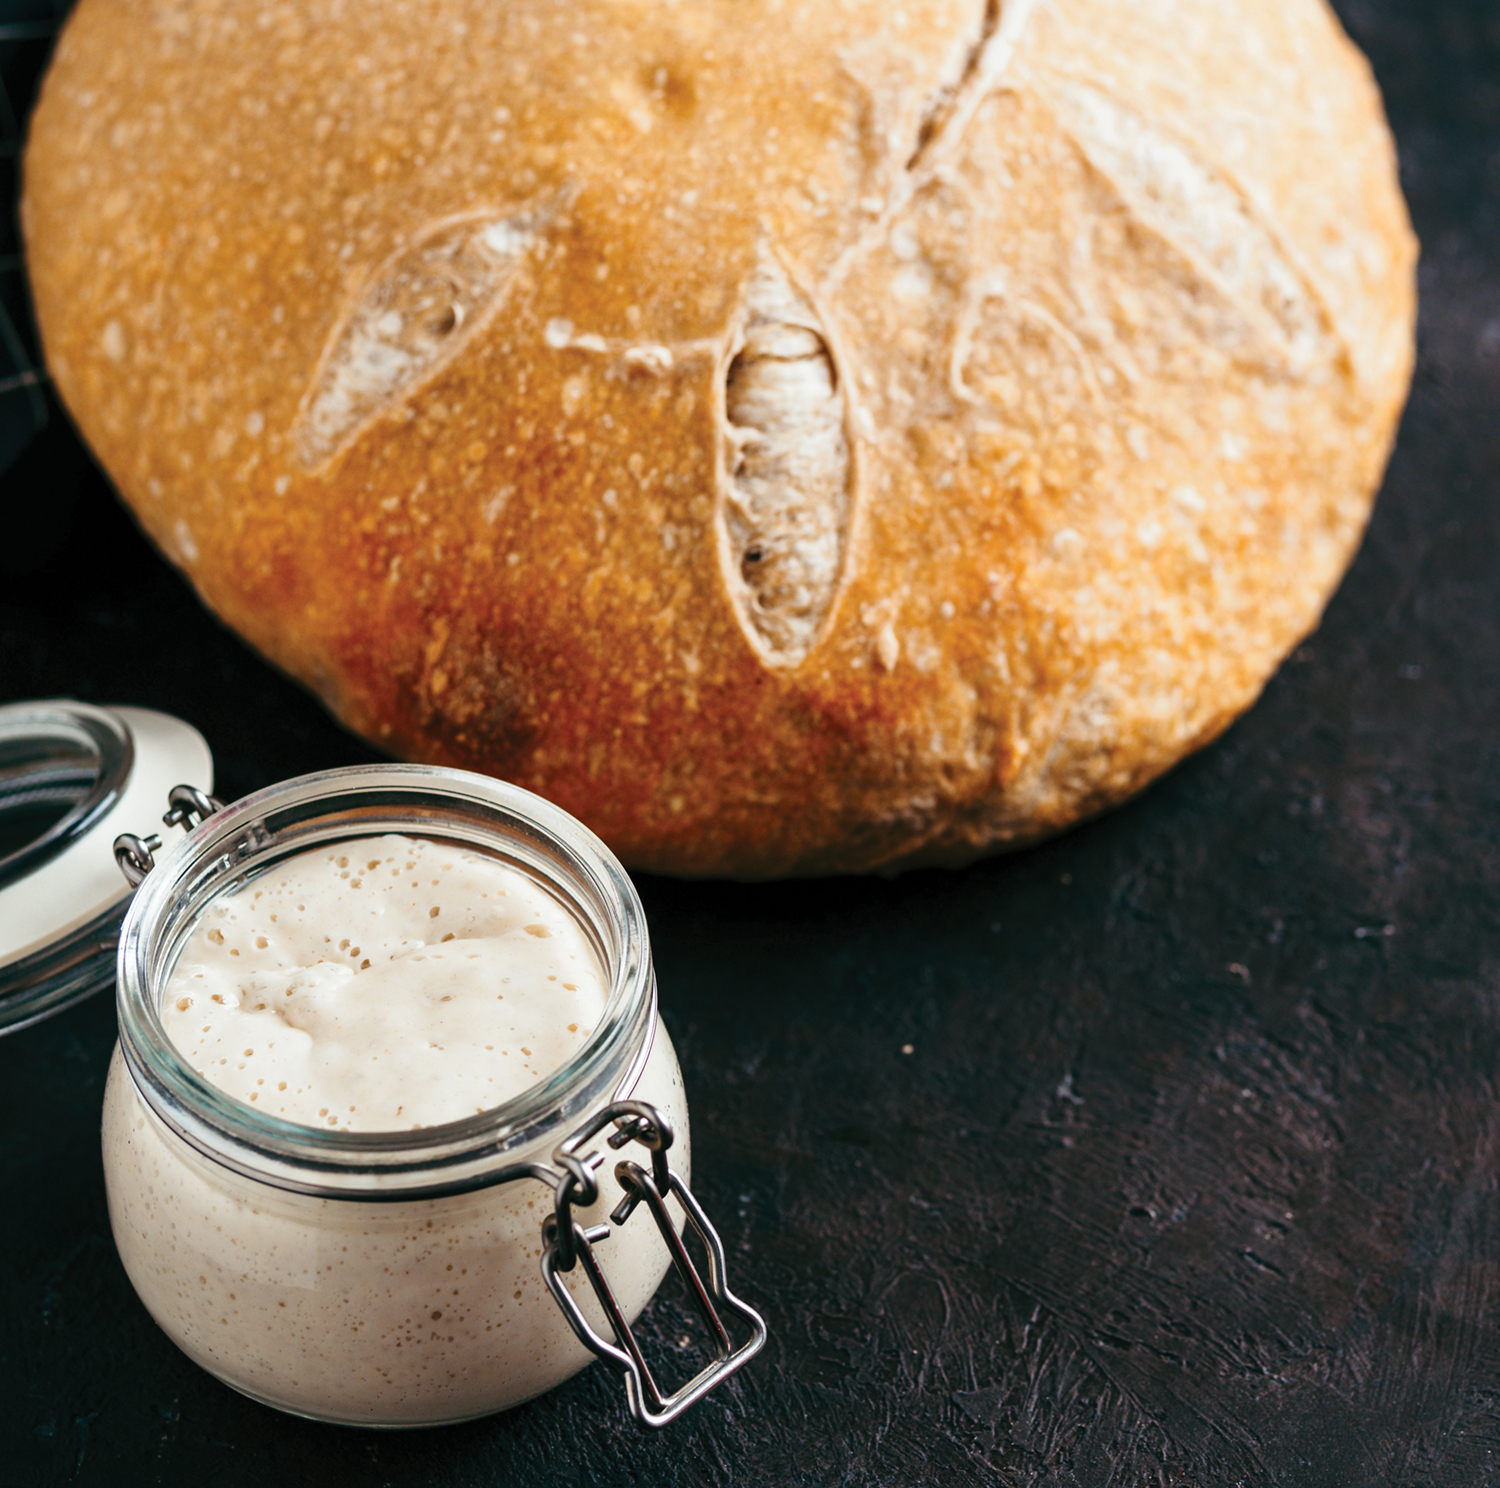
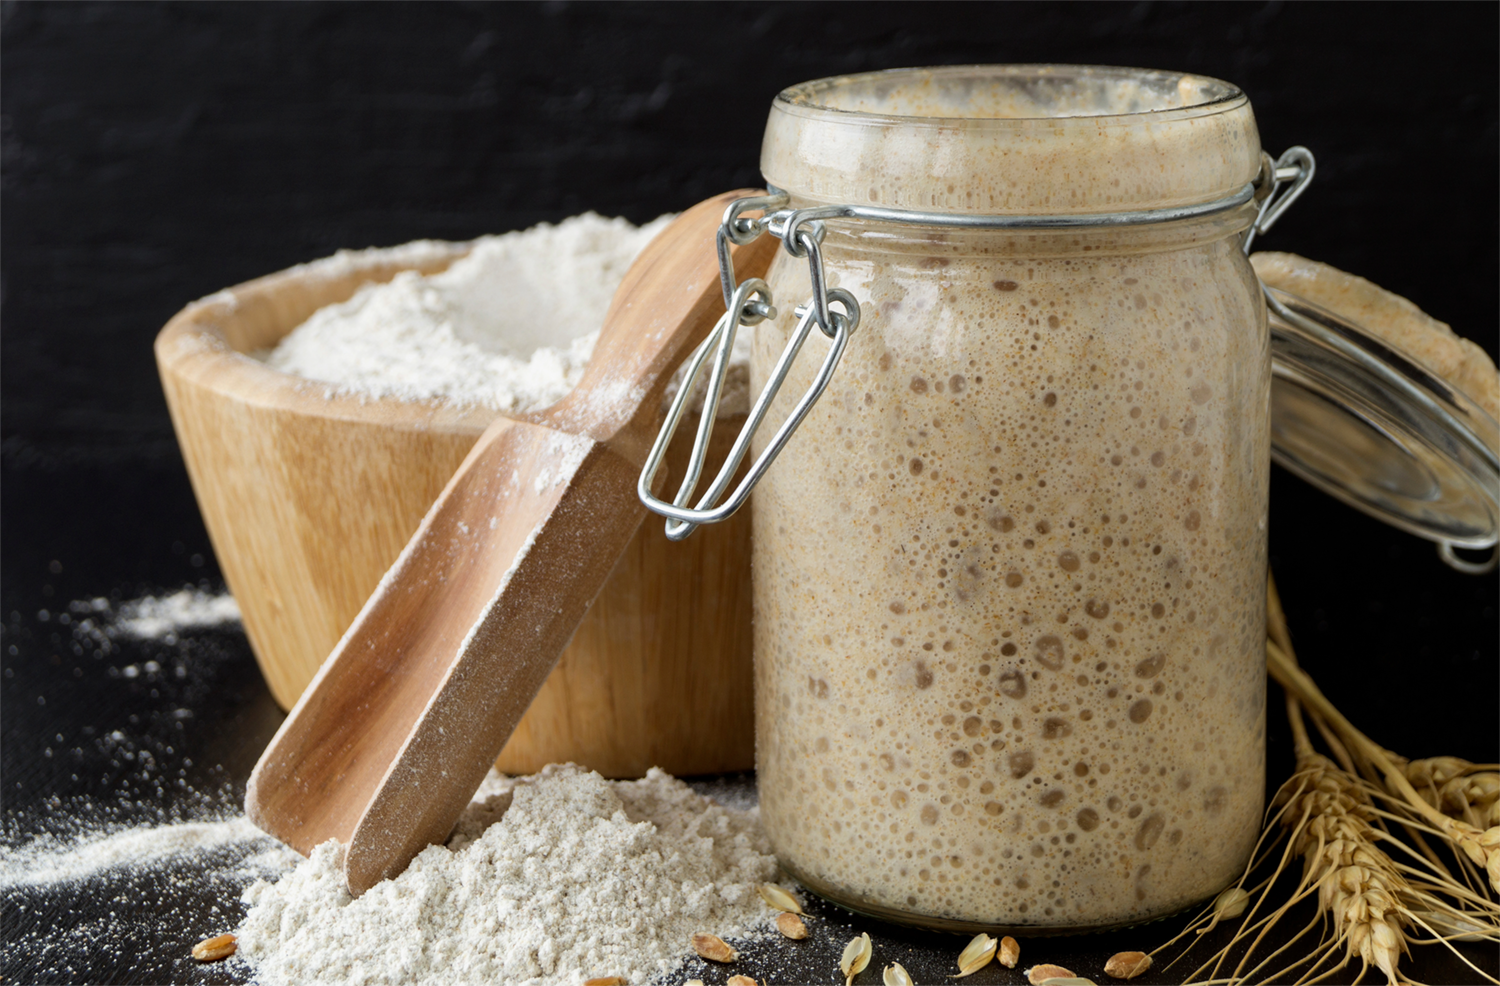
Today, sourdough creation has been refined into a widely accessible process. To create a sourdough starter all you need is a jar, a towel, flour, and water. The necessary bacteria culture is naturally occurring and doesn’t need to be added as it develops with the fermentation process.
Combine the flour and water into a dough-like texture, place in a jar, cover it with a towel, and wait for it to rise. This can take from several hours to several days to a few weeks. To continue your starter supply, keep adding flour and water as time goes on. Some continue to feed their sourdough starter for years.
Once the starter is established, you can feed it up to twice a day using a ratio depending on how much you want to bake. Start with a ratio of 1:2:2 — one part starter, two parts flour, and two parts water.
For the jar, any sturdy glass or ceramic container will do, preferably one with straight sides to make it easy to scoop the dough out and one that won’t degrade over time with use. Check on the starter every morning and you will start to notice bubbles forming on the top and a yeasty, sour smell. This is a sign the dough is fermenting.
Occasionally, a dark liquid may form on top of the starter. This liquid is called hooch and is a sign that the dough needs to be fed. A consistent feeding schedule is key to prevent hooch from developing. The choice is yours to either mix in the hooch or drain it out. Reincorporating the hooch can give the bread a tastier flavor.
When there is an abundance of bubbles and the starter has doubled in size, it is time to bake. The texture should be fluffy and spongy, perfect for kneading.
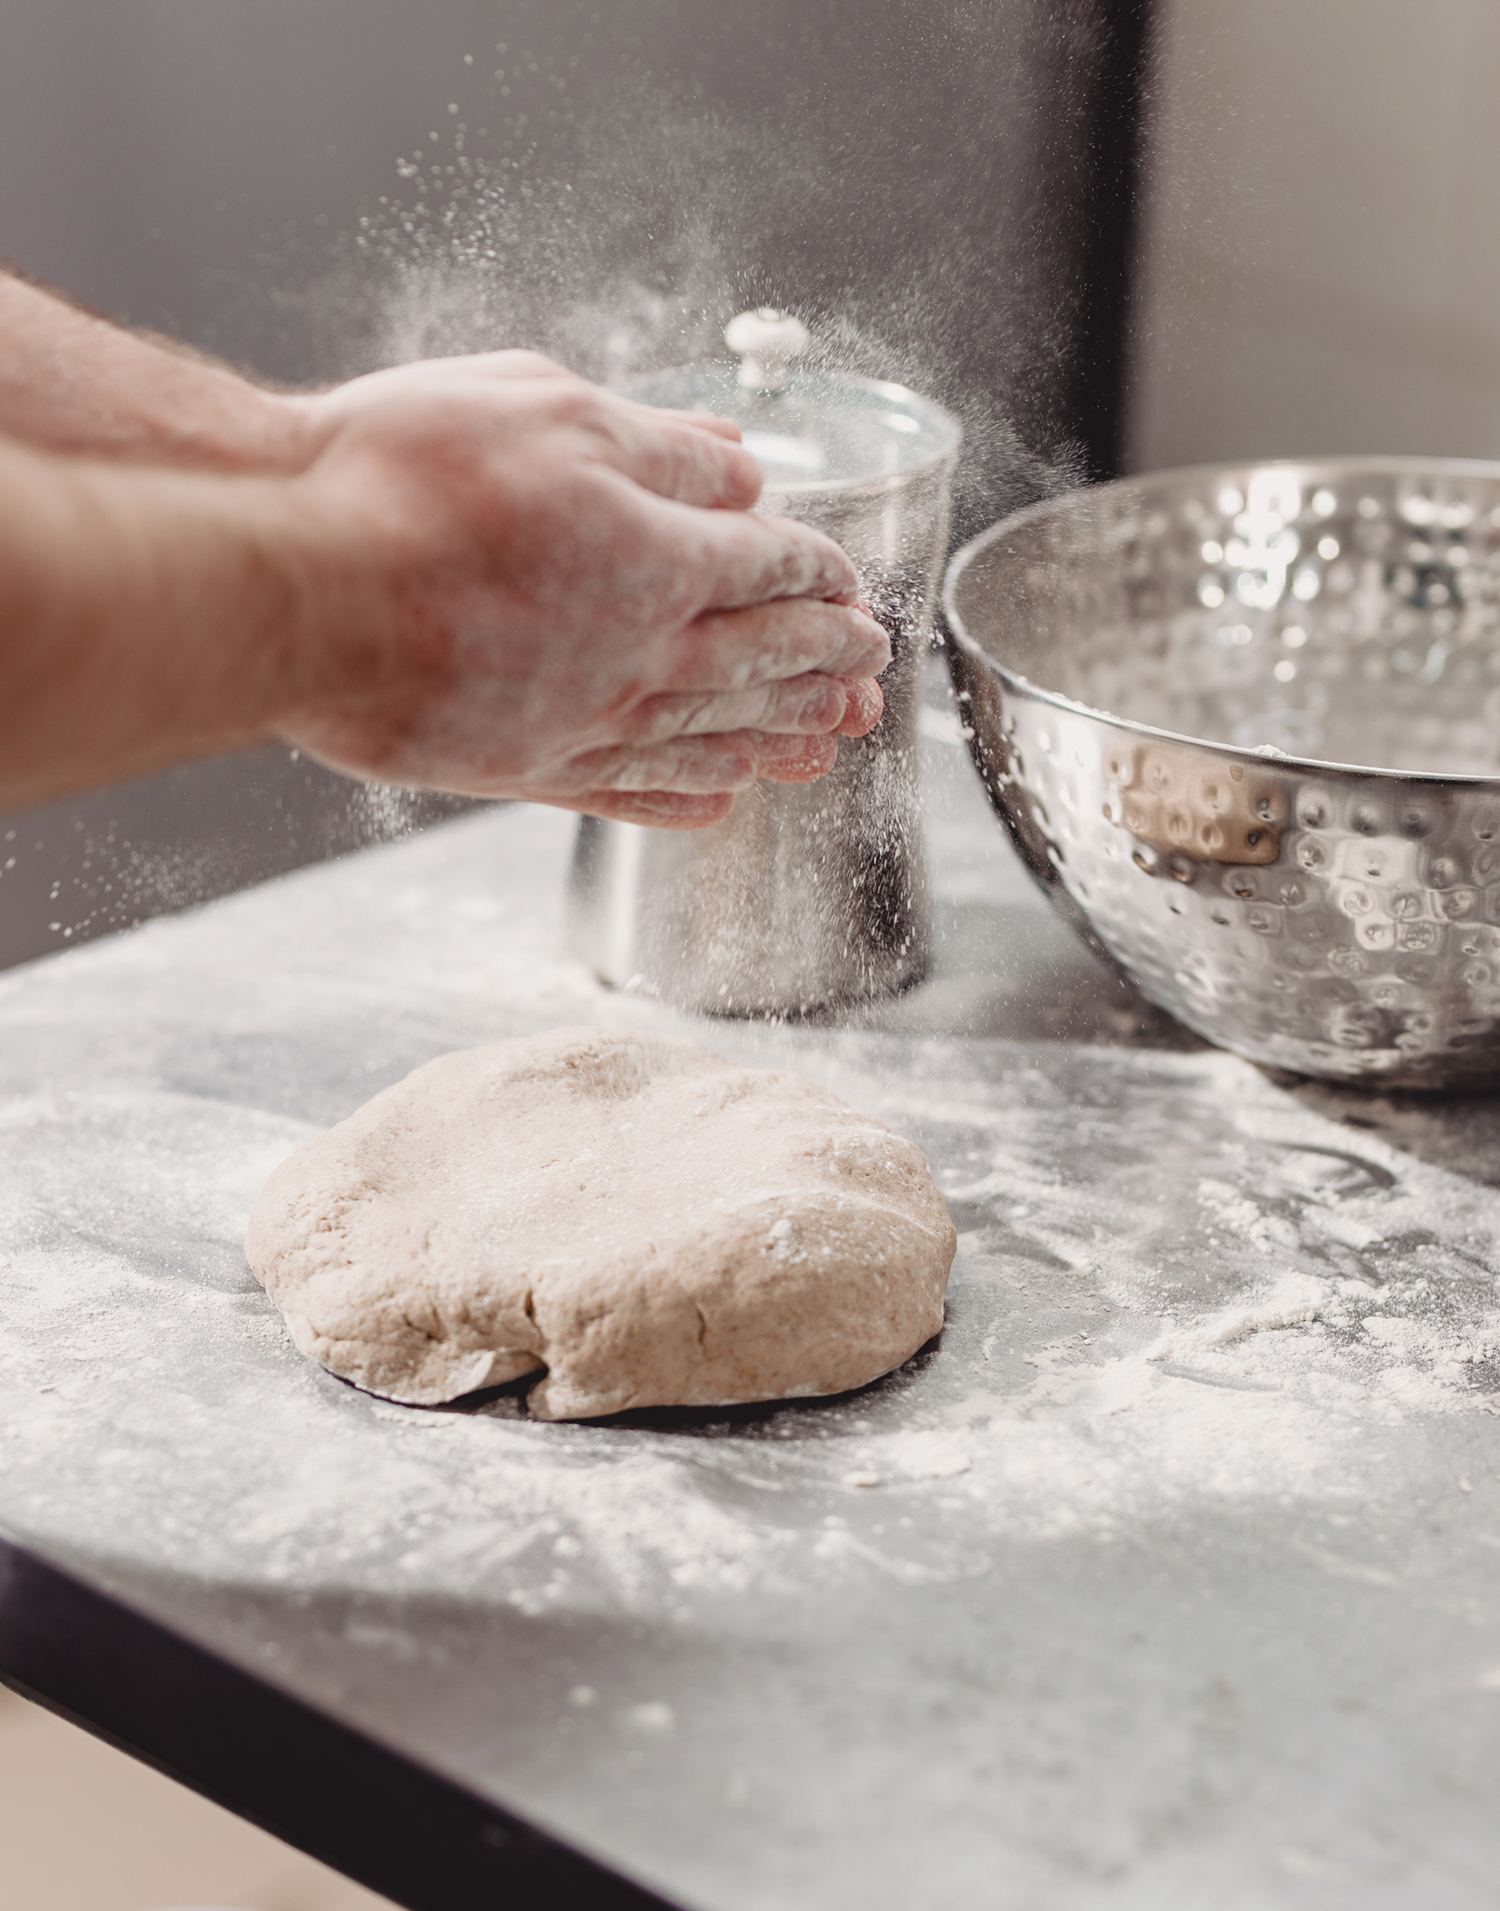
Two recommended supplies for kneading and baking are a bench scraper and Dutch oven. A bench scraper is a flat metal tool that makes gathering the kneaded dough into a pile easier and can also be used to shape and cut the dough into even balls for baking.
A Dutch oven is used for baking the dough as the container helps maintain the classic round shape of a sourdough loaf. If you do not want to knead with your hands, a kneading machine can take the pressure off your wrists and arms.
Ready for fresh, homemade bread? Take half the starter out of the jar and combine with more flour and water and begin to knead the dough. Adding in salt or olive oil while kneading can help soften the crust and change the taste of the loaf.
Spend about 8 to 15 minutes kneading the dough. You can tell when the dough is perfectly kneaded when it can be stretched without tearing. Over kneading the dough can lead to it being tough and dense.
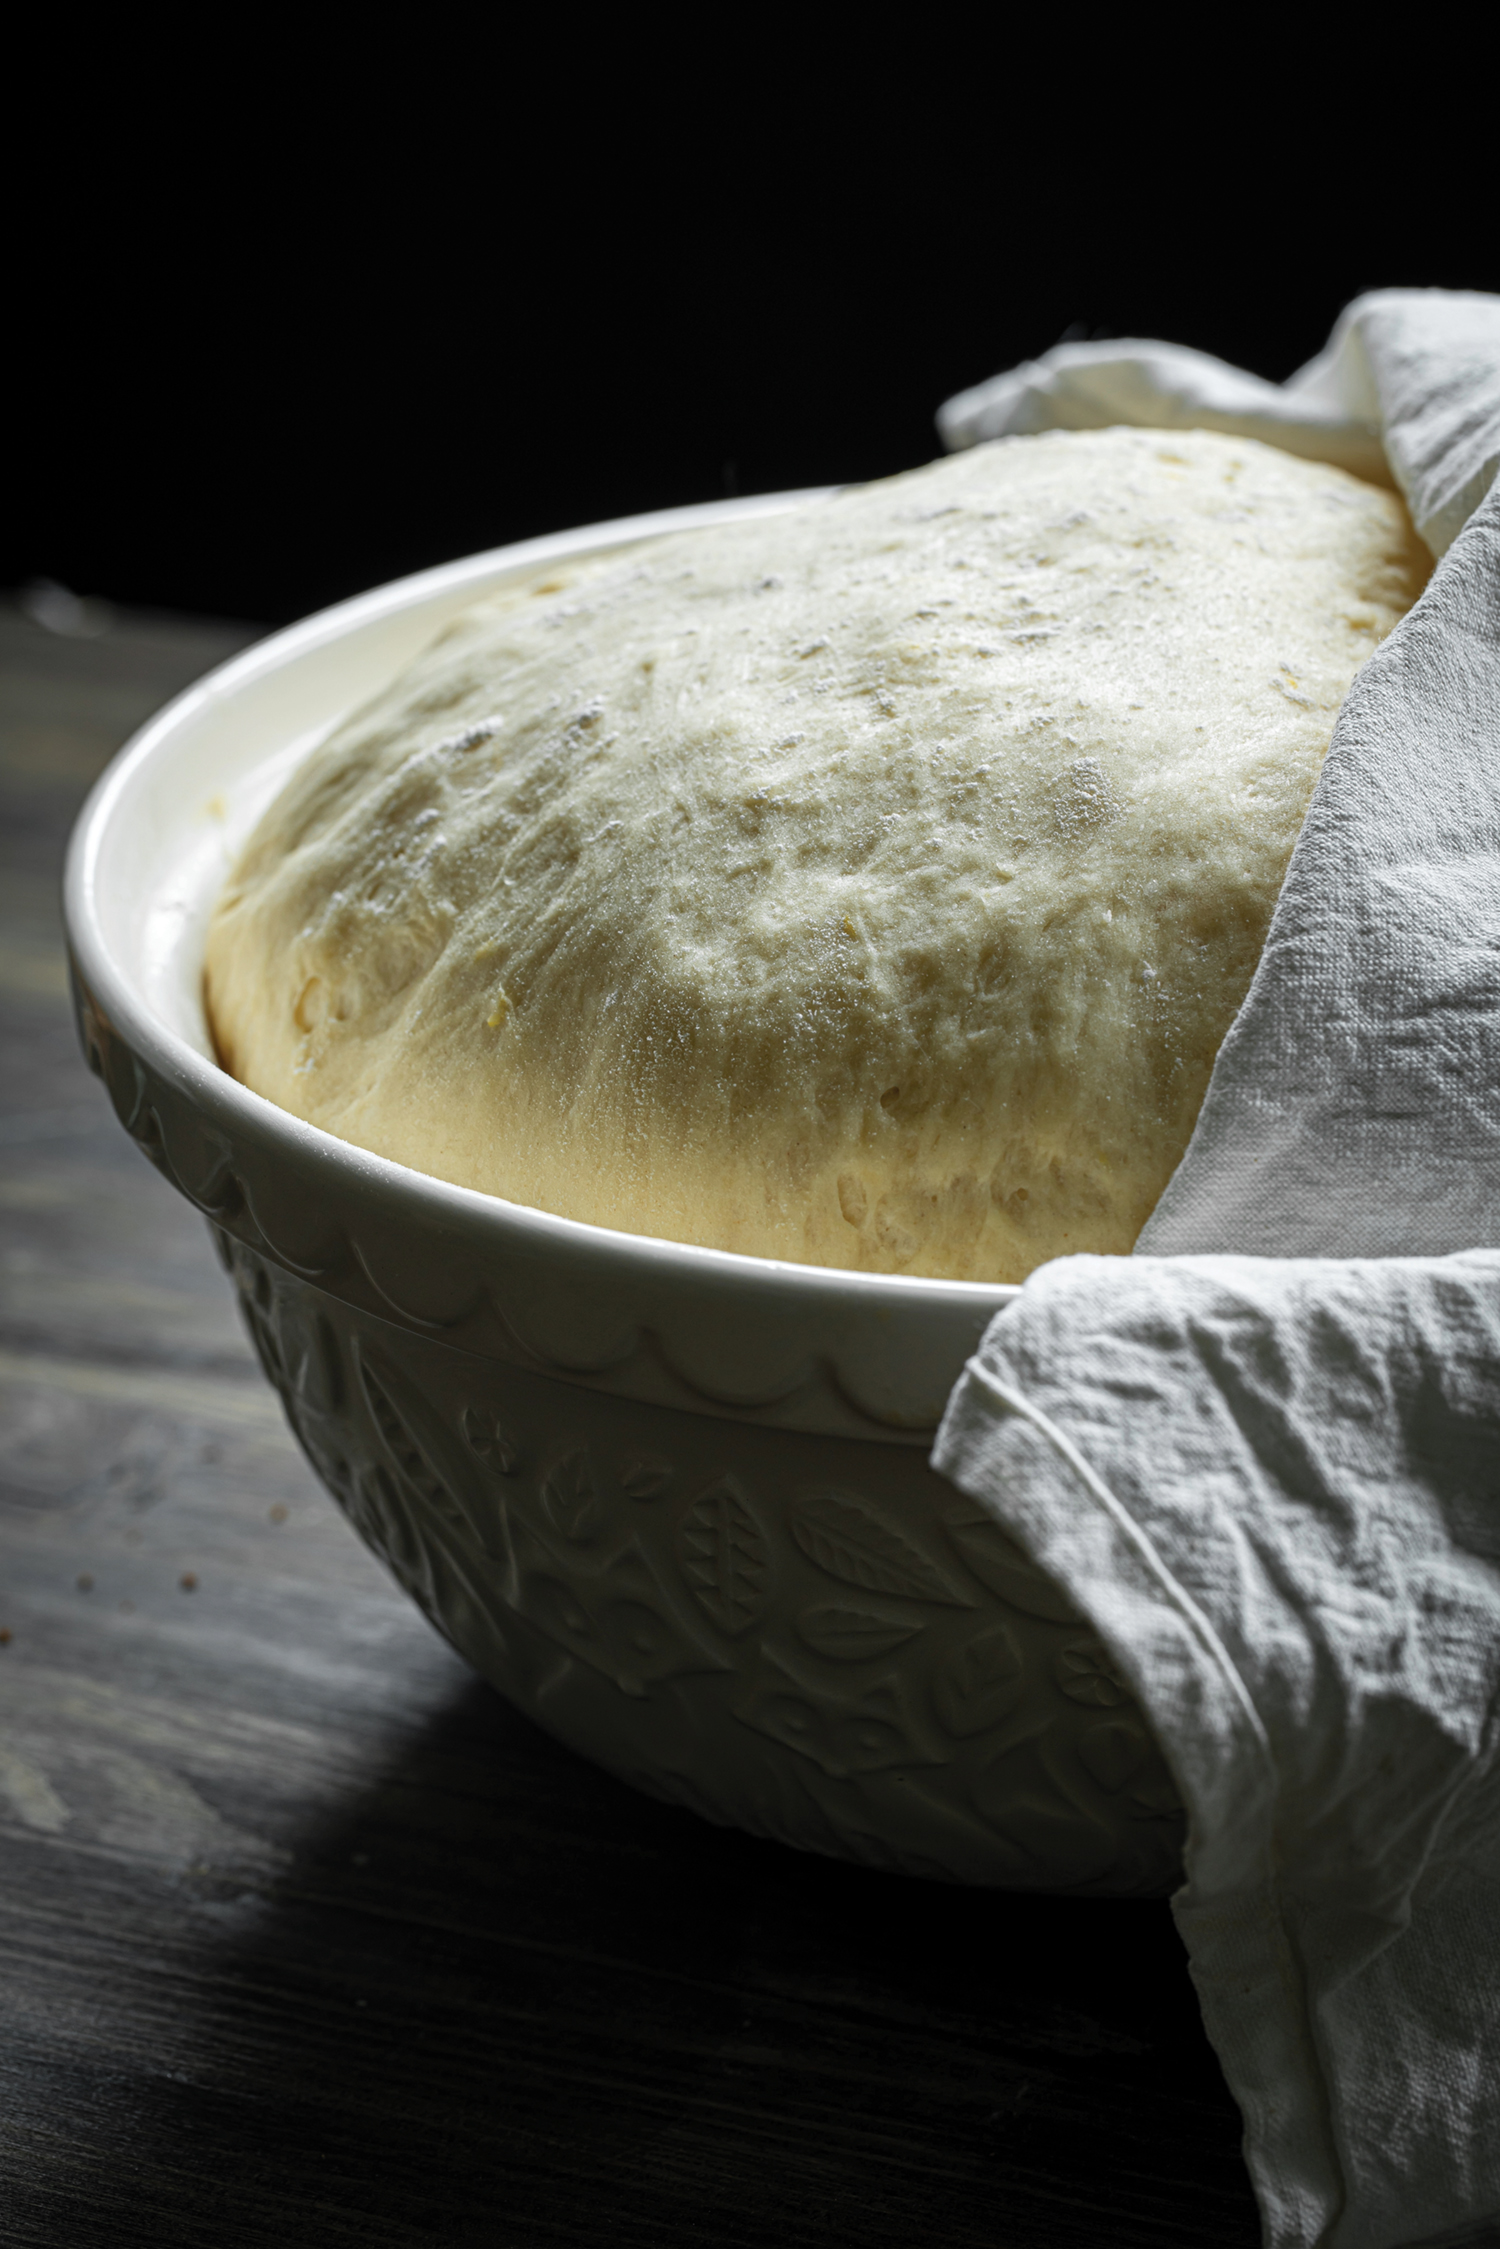
Set aside your dough to rise for several hours. The temperature of the ingredients and the strength of the starter will determine when the dough is ready to be shaped. The rising process can be anywhere from 1-24 hours. After some time and patience, the dough is ready to be shaped and baked.
Beyond the extensive history and timely process of creating sourdough bread, there is a true art form in making your own. Taking the time to nurture and grow something that is going to be delicious makes the whole experience worthwhile.
Enjoy your hard work with avocado toast sprinkled with everything-bagel seasoning, a delectable lunch veggie panini with balsamic glaze, or a pre-dinner toasted addition to a charcuterie board.
There are endless possibilities and pairs to this bread, and it can be savored by all.

Beginner Sourdough Recipe
Equipment
- Dutch oven (cast iron)
- Towel
- Medium bowl
- Large bowl
Ingredients
- ½ cup of active starter dough
- 3 ½ cups of bread flour
- 1 ⅓ cup of water
- 2 tsp of salt
- Optional: 20-25 grams of olive oil (about 1.5 tablespoons)
Instructions
Feed the starter the night before making your bread using the 1:2:2 ratio (1 part starter, 2 parts flour, 2 parts water) to make sure it is active and bubbly by the morning.
Combine the starter, salt, water, and flour into a medium mixing bowl until it forms a consistent dough with no dry flour left. Set aside the dough and cover with a towel to rise for about an hour at room temperature.
Knead the dough in the bowl by folding it in on itself, rotating it, and folding in a different section for 10 minutes. Repeat six times with a rest time between each set. If the dough is wet, wait 15-30 minutes between kneading. If the dough is dry and stiff, wait 30 minutes to an hour to allow the dough to stretch between kneading.
Cover with a damp towel and let ferment for 6-12 hours.
Place the dough on a floured surface. Fold the dough in on itself and shape it into a ball by folding the sides together to meet in the middle and repeat with the other two sides. Place the rounded dough into a large, floured bowl with the seam side up and cover with plastic wrap.
Let the dough rest in the refrigerator for 12 to 15 hours or on the counter at room temperature for 3-4 hours.
Preheat the oven to 450 degrees with the Dutch oven inside.
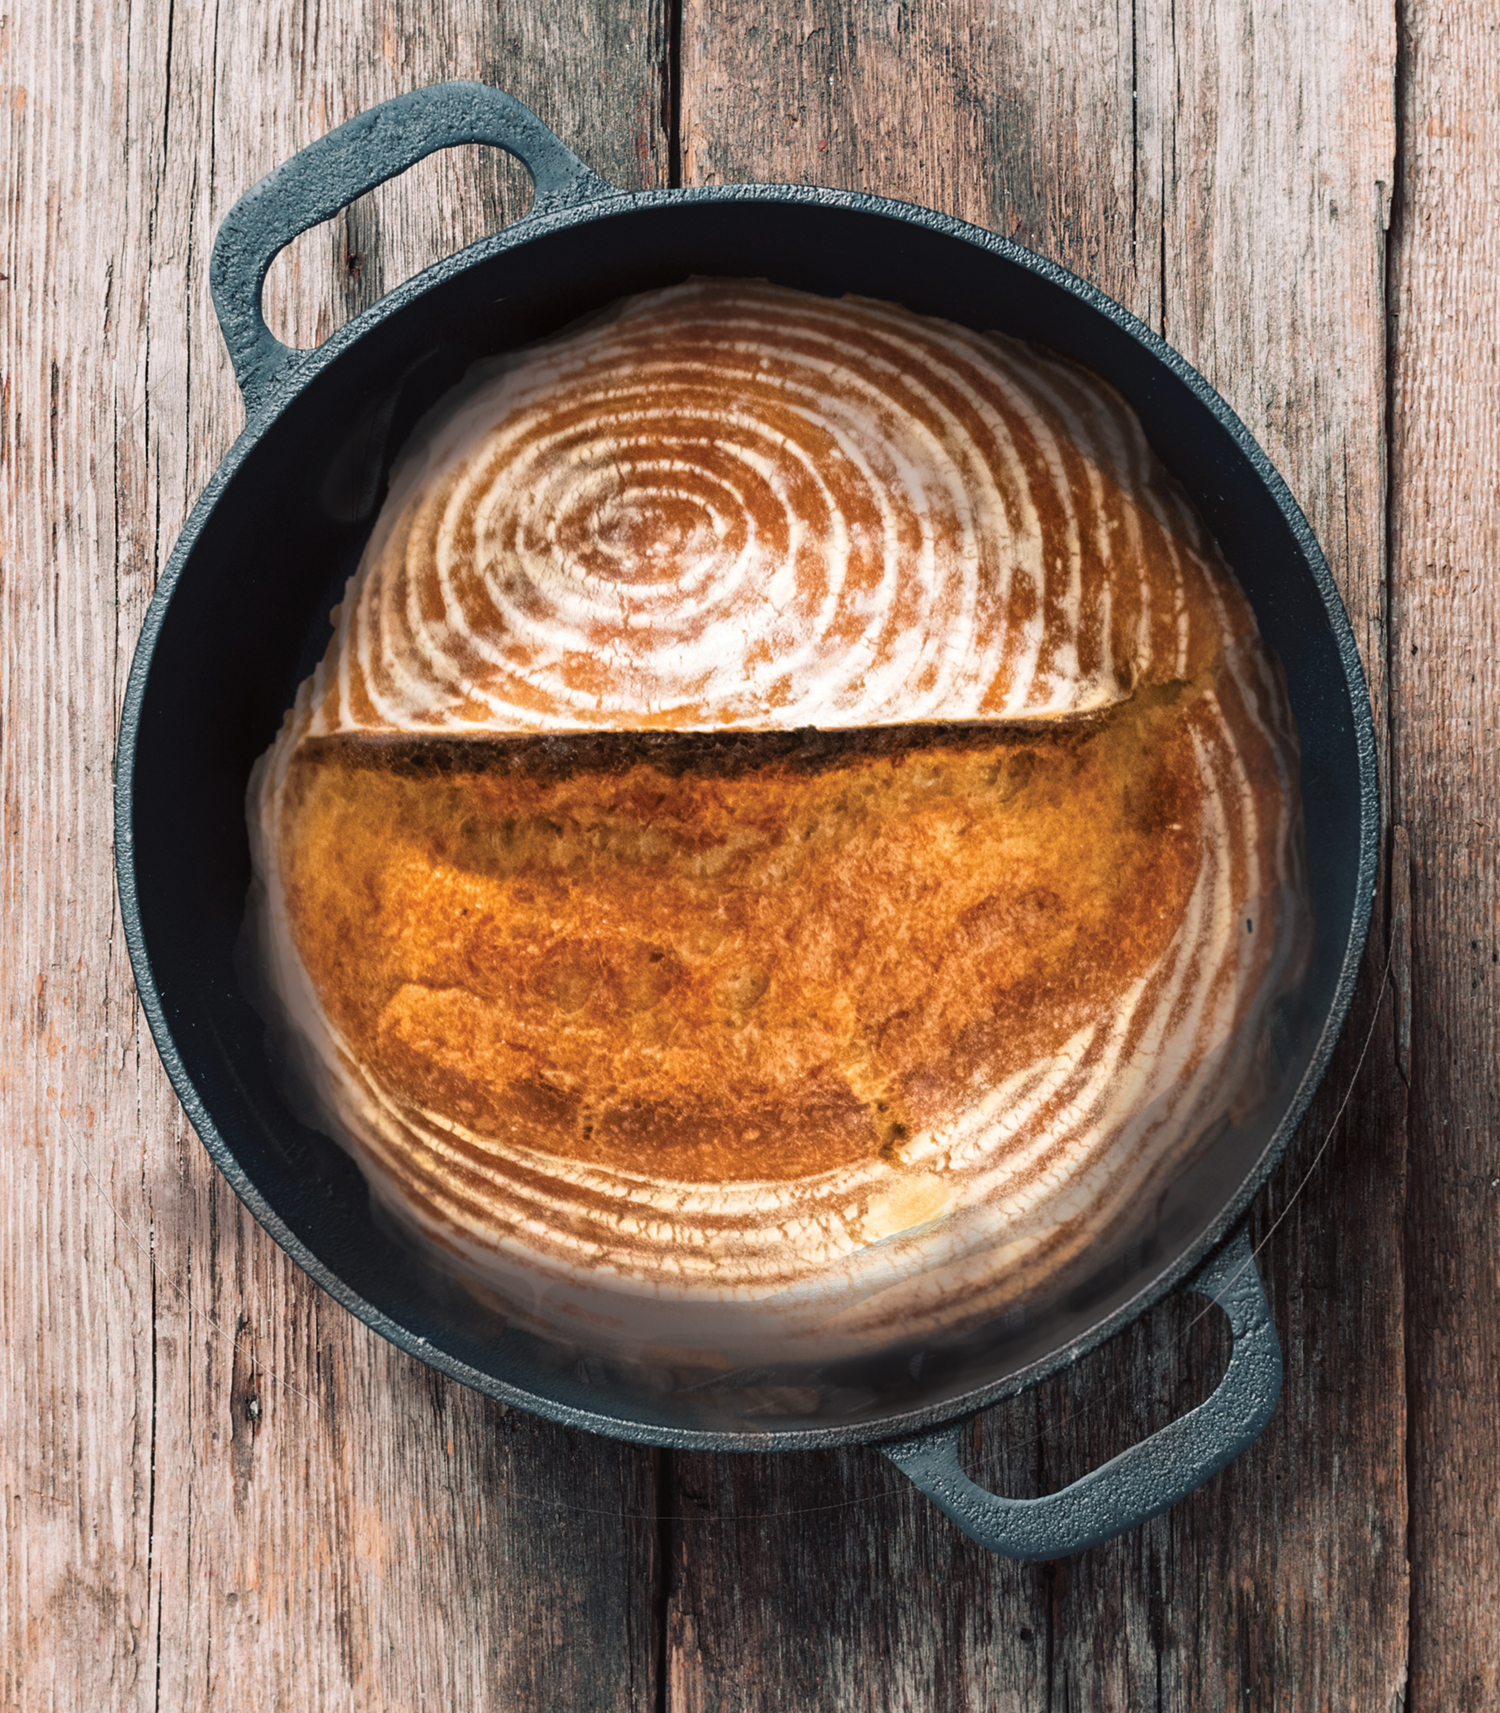
Place the dough onto parchment paper and scour the dough into the desired pattern. You can make a single scour down the middle or create patterns such as leaves, spirals, or mandalas.
Place the dough with the parchment paper in the Dutch oven and bake covered for 20 minutes. Remove the lid and bake for another 25-30 minutes until the top is golden brown and crusted.
Remove the Dutch oven and remove the bread using the parchment paper to lift it out. Cool for 4-6 hours. This allows the steam to be released and prevents a wet, gummy texture.
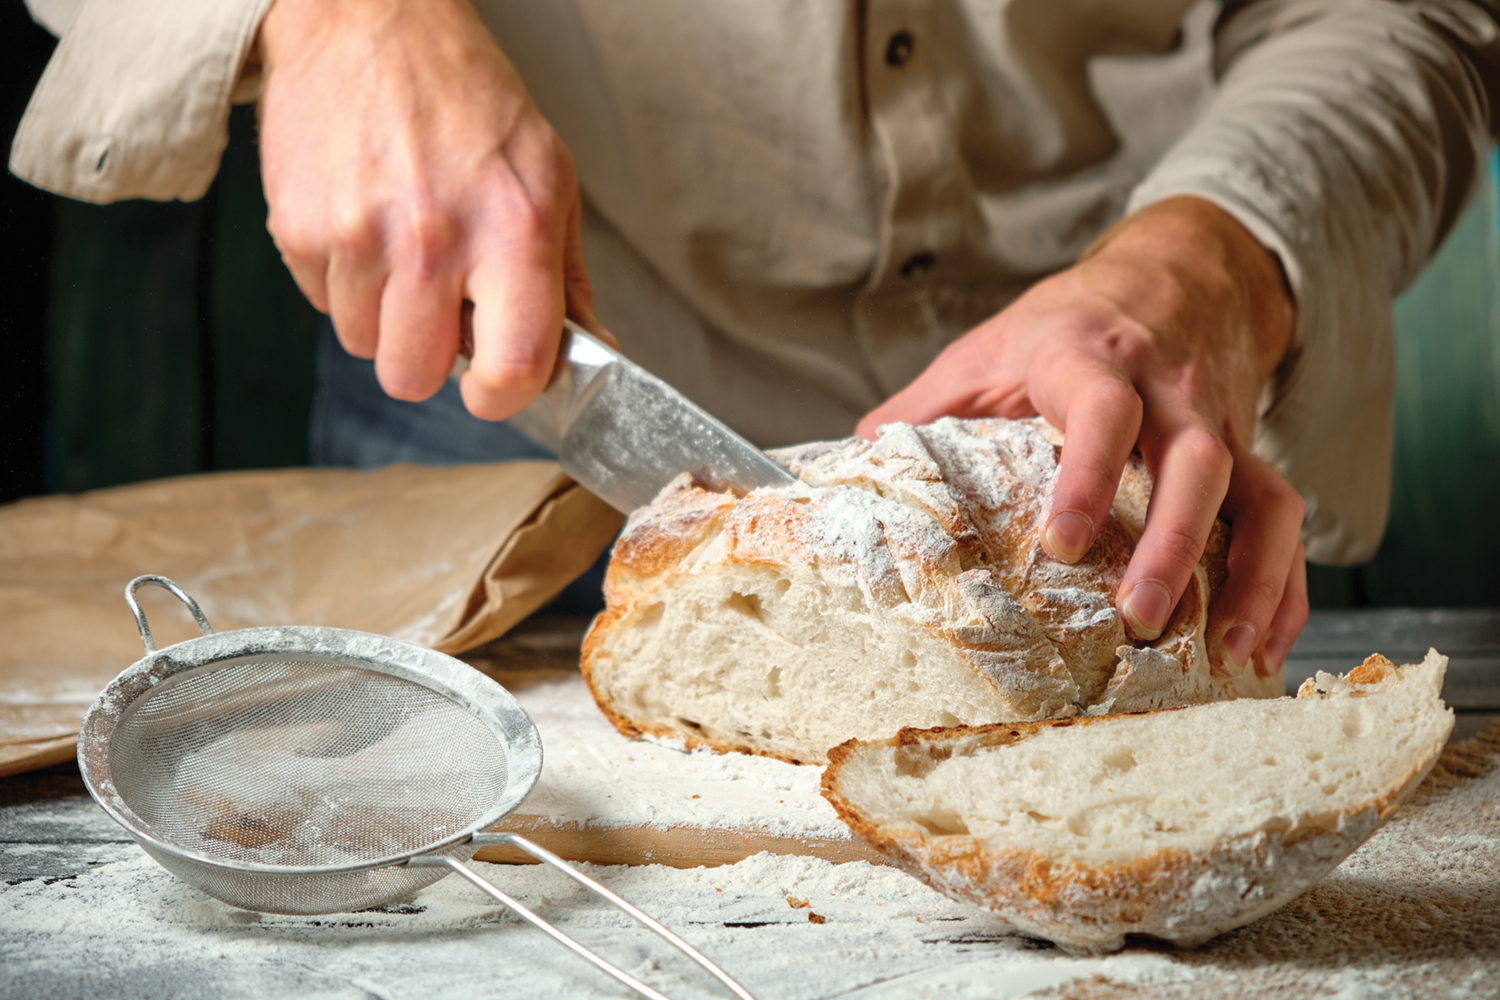
Slice with a bread knife and enjoy a variety of styles and recipes.
Baker’s tip: bread dough rises best in a warm place; cold, rainy days will impact rising time.